Test automation is widely considered to be a cornerstone of agile development. If you want to release fast, even daily, with reasonable quality, you have to move to automated integration testing.
Tools like JUnit, Jasmine and Mocha helped us automate our unit tests. Tools like Selenium, Watir and Ranorex helped us automate UI tests. But what about integration tests? There is no off-the-shelf tool for automating them. Unless you’ve built your own, or use a fancy CI automation platform like Electric Cloud or Xebia, how the heck can you run those tests as part of your continuous integration process?
In this post we’ve put together a quick test automation tutorial that can help you do exactly that – plug integration testing straight into your CI testing flow. automate a simple integration test, using everyone’s favorite continuous tool, Jenkins, and everyone’s favorite container platform, Docker. Why do we need Docker? To automatically setup a multi-host environment in order to realistically test the integration between two components.
Read on and you’ll be able to tell your friends: “Woohoo! I just automated my first integration test.”
A Quick Guide: How to Write Your First Automated Integration Test
The Test
Here is an integration test written in Java and Spring, using the arrange-act-assert (AAA) methodology:
[sourcecode language=”plain”]
@RunWith(SpringRunner.class)
public class MyIntegrationTests {
@AutoWired
@Rule
private WireMockRule wireMockService;
@AutoWired
private DataTestUtils testUtils;
@AutoWired
private SystemUnderTest sut;
@Test
public void should_send_data_to_endpoint_when_query_is_ran() {
// Arrange
this.testUtils.execute(“INSERT INTO TBL (COL1) VALUES(‘1’)”);
this.service.stubFor(put(urlEqualTo(“/end-point”))).willReturn(status(200));
// Act
this.sut.execute();
// Assert
this.service.verify(1, RequestPatternBuilder.newRequestPattern()
.withUrl(“/end-point”)
.withRequestBody(containing(“{ \”COL1\”: 1 }”)));
}
}
[/sourcecode]
In this example, you can see that we have two integration points, a mock REST API call in the field ‘wireMockService’, and data test utilities that allow us to insert data into a database. What we expect from this test is what is in the assert phase. The assert phase shows that when there is one row in our database, then we expect a certain output sent to the end point “/end-point”.
This code tests the interaction between the REST API, database, and the system under test.
The Environment
Now that you have an integration test, how do you automatically scaffold your environment?
A popular technology to use for mimicking the architecture of your application is Docker. Technologies such as databases, caches, message queues, REST servers, and so on, can be run and monitored using Docker. If you want to test your application with all components together, then using Docker is an easy way to achieve this. Here is a quick example of a docker-compose file:
[sourcecode language=”plain”]
version: ‘3’
services:
db:
image: “oracle”
ports:
– “1521:1521”
[/sourcecode]
This file defines that we want to run the Oracle database. With a simple command-line command:
[sourcecode language=”plain”]
docker-compose up
[/sourcecode]
We can run these services on a build server, or even locally. Once the docker services are up and running, your system under test can be configured to connect to them, and your integration tests can then be run. But how do you run your integration tests?
The Fun Part: Automating Your Integration Tests
It’s important to keep all your configuration code within your repository. For the Java example, you should use Maven or Gradle to create your build steps. Maven allows you to define plugins, and each plugin can be run at a specific build phase. For example, you can use the docker-maven-plugin to start and stop docker containers:
[sourcecode language=”plain”]
io.fabric8
docker-maven-plugin
package
package
source
app
oracle
8080/tcp
artifact
/
prepare-it
pre-integration-test
start
oracle
oracle:latest
1521:1521
remove-it
post-integration-test
stop
[/sourcecode]
This tells Maven that, as part of the pre-integration-test phase of our build, we want to start the Docker containers. This allows us to boot up docker, wait for 30 seconds, and then enter the integration testing phase:
[sourcecode language=”plain”]
org.apache.maven.plugins
maven-failsafe-plugin
integration-test
verify
[/sourcecode]
The maven-failsafe-plugin is designed to run integration tests. This allows us, as part of the verify goal, to run our integration tests within our application.
The final step is to run the Java application with a command line argument:
mvn clean verify
This runs the clean phase of our build process, that is, remove the target directory, and then verifies our system. Verification will build our system and then run the plugins that we have deemed necessary.
This command can then be added to a bash shell script (for example, build.sh) and saved along with our repository. We can then take Jenkins (or any other build system), and tell it to run that shell script as a build step:
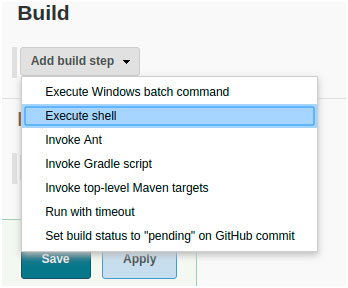

This allows us to run the build.sh file, which contains our mvn clean verify command.
Running the build will automatically run the verify phase. When Maven runs, it will automatically output the results of each integration test written in our system. If integration tests all pass, then the maven-failsafe-plugin will output the following in the build logs, signifying success:

To highlight the difference, here is one of the build steps failing

By having the build steps outside of Jenkins, we can version our build code. Versioned build code can be shared and used across multiple build pipelines in your organization.
Integration Test Automation? Done
In this article, we gave you a give quick start on automating integration tests, using some Java code, Docker and Jenkins, to achieve a more complete agile test automation flow.
Similar setups can be achieved in different stacks, such as MSBuild in the .NET world. MSBuild has a similar concept, using targets and resources as its build phases. Keeping you build phases in your code allows you to version your build system, and also to share the build system across many projects.
Automating integration tests isn’t hard, it just takes a little knowledge of the stack that you are using. I hope this article has guided you in setting up your automated integration test environment. Happy automation!